In the previous section, we selected our Start URL and loaded the web page into Content Grabber. Next, you can select the data you want to capture and start building your web scraping agent. In our Cruise Direct example, we plan to search for available cruise vacations and then extract details about each cruise.
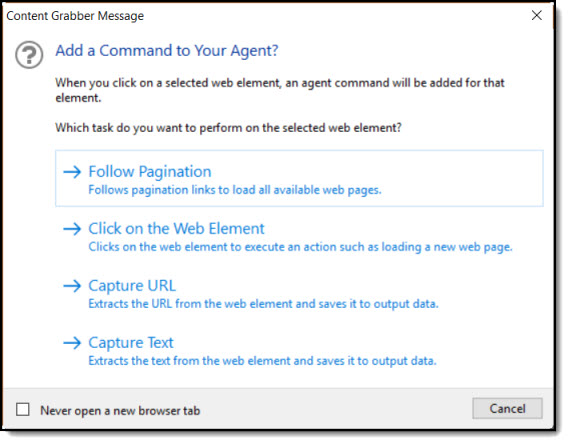
1.Firstly we need to perform a search to retrieve the data for the available cruises. To do this, we select the orange Search button element with the mouse, then click one more time to display the Content Grabber Message window.
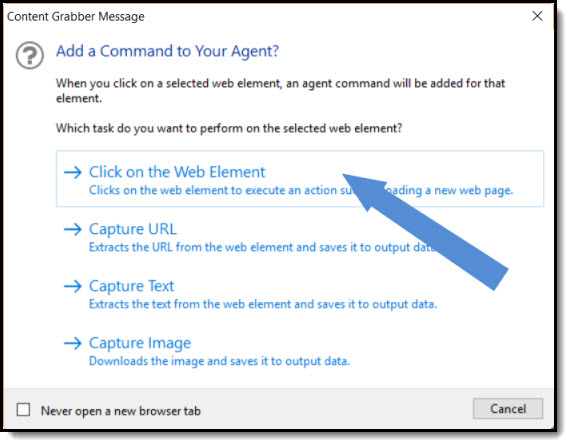
Content Grabber Message Window
2.From the message window, we choose the Click on the Web Element option to add a new command to the agent that will execute the search and display the search results on a new web page. Notice that Content Grabber has added our first command to Agent Explorer - in this case to execute the search and display the search results.
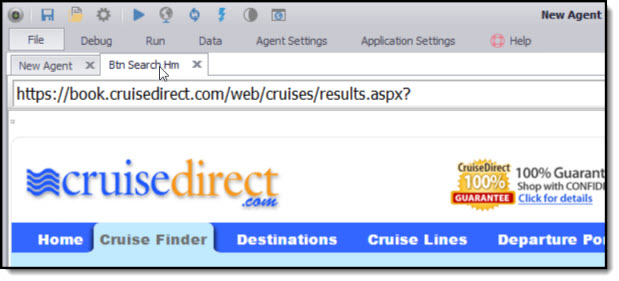
Agent Explorer with new Search command linked to new Search page
3.We are now ready to add commands to our agent to extract the cruise data. As we have a number of data elements in tables, we will use a list to simplify the extraction for us. To capture a data element, move your mouse precisely over the data element you want, until you see the data-capture box around it. We start by selecting the first cruise name.
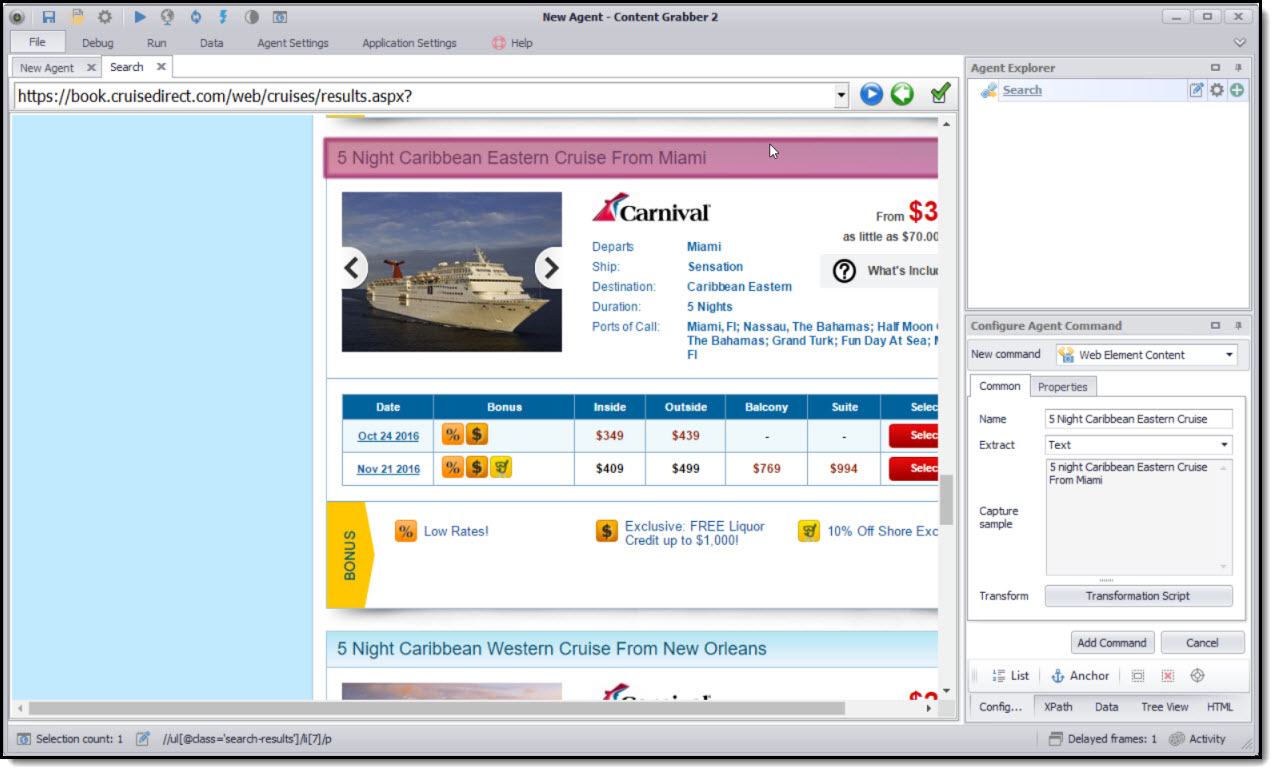
First Cruise Line data element selected within Content Grabber
4.Then click List in the Configure Agent Command panel to activate the list selection mode.
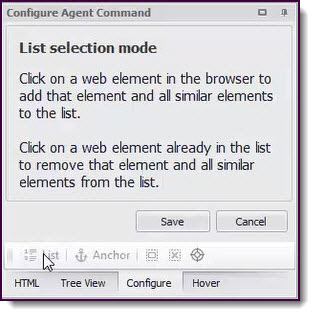
Activating List selection mode from the Configure Agent Command panel
5.In list selection mode, we can add web data elements into the list by clicking similar data elements. Now we'll click on the second cruise name and you will see Content Grabber has selected the remaining data elements on the page. Note: if any cruise data elements remain unselected, simply click on these to add to the list.
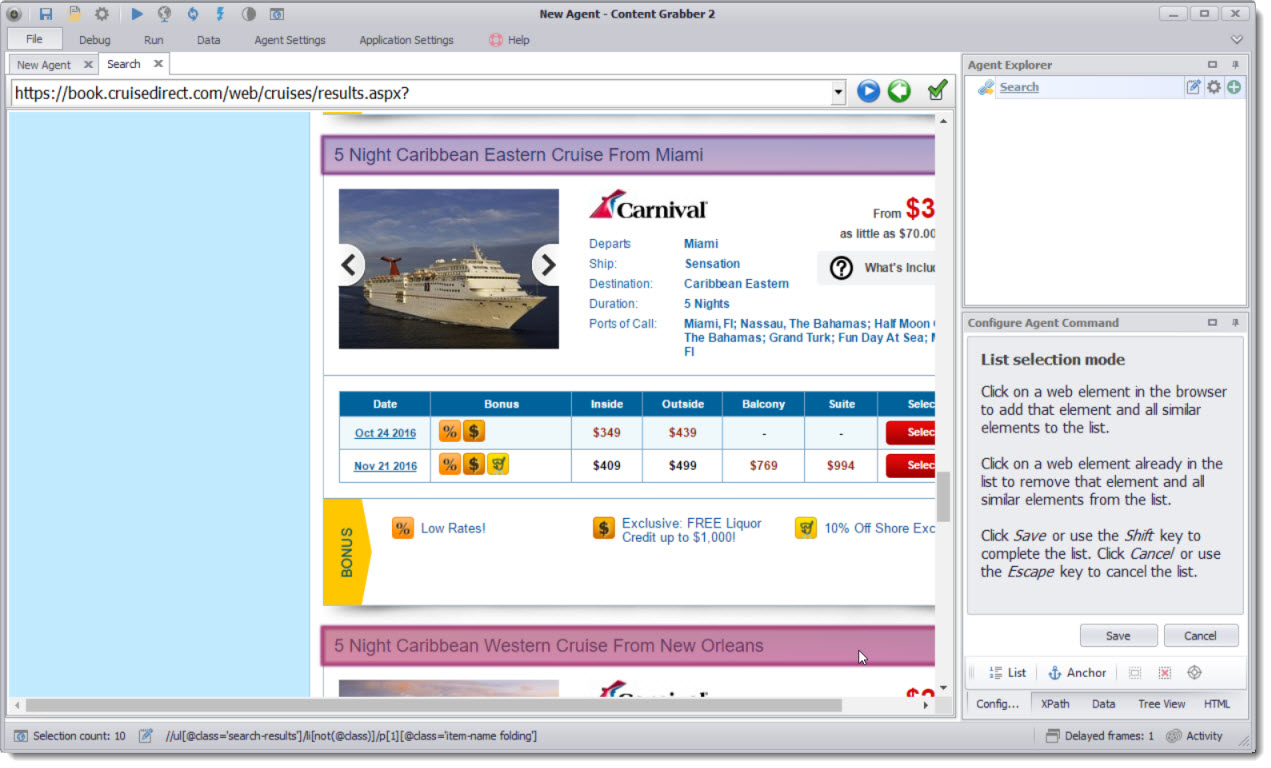
Second Cruise Line data element selected while in List selection mode
6.We now click Save to save the list and exit list selection mode. The Web Element list command defines the list area, so any elements within this area are now included within the list.
7.To capture the cruise name text, we click on any selected element to display the Content Grabber Message window. From the Content Grabber Message window, choose the Capture Text option to add the web element command to capture the cruise names. We have now added new web element list and web element commands to the Agent Explorer and Content Grabber has set default names for these commands.
8.To edit the names for the commands, we click the respective Edit icons and set the names of the commands to ‘Search List’ and ‘Cruise Name’. Then click the Green Tick to save.
Agent Explorer with new Search List and Cruise Name commands
9.Now we plan to extract the individual cruise web elements from each table. So firstly click on the Departs web element. Content Grabber now automatically selects the Departs web element for all cruises because it is already defined as a list.
10. Next, click on the Departs web element one more time to display the Content Grabber Message window. Now choose the Capture Text option from the Content Grabber Message window to add the command to the Agent so we can capture the individual Departs web elements.
11. After that, we click the Edit icon to change the name of the command to "Departs" then save it.
12. Now we do the same for the Ship, Destination, Duration and Ports of Call web elements, then set the respective names of the commands and save them.
13. We also want to capture all the price information in the pricing tables, so as before, we select the first web element (Date) in the pricing table. We then click List in the Configure Agent Command panel to activate the list selection mode, and click on more Date web elements to generate the list.
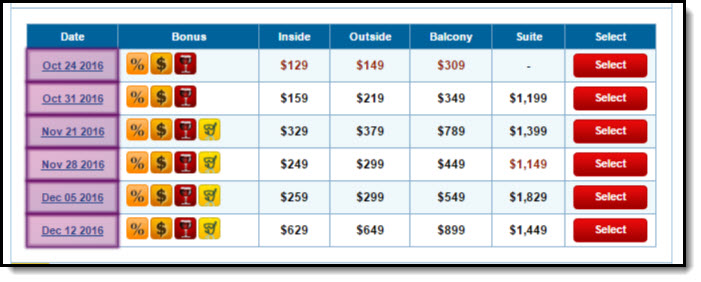
14. Click one more time on one of the Date web elements to display the Content Grabber Message Window. Then choose the Capture Text option to add the command to the Agent.
15. Add commands for the ‘inside’, ‘outside’, ‘balcony’ and ‘suite’ web elements by clicking twice on each of the web elements.
16. Change the names of the new commands so your agent looks like the image below.
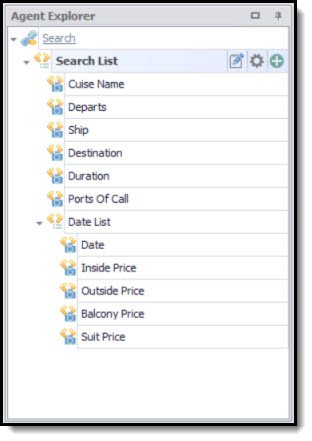
Agent Explorer showing all Capture Text commands
17. Thus far we have created the Agent to extract all the cruise information on the first page. We need to set it up to iterate through all the search result pages. To do this, we need to use the Follow Pagination command to follow each of the pages. Scroll down the page and select the Next link. Then click one more time on the selected element to display the Content Grabber Message window.
Content Grabber Message windows with Follow Pagination option selected
18. Now we choose the Follow Pagination option to add the pagination command to the Agent.
Content Grabber has added the pagination command to the Agent and loads the next page on the second browser tab.
19. When we click on the pagination command we can see all the search list commands inside of the pagination command. This means our agent will now iterate through all the search result pages to extract this information.
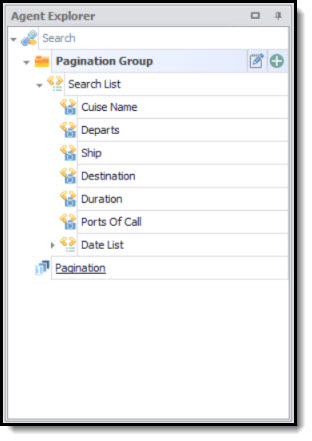
Agent Explorer showing the contents of the Pagination command
20.We have now finished building the Agent so we should save it. To save the Agent, choose File > Save in the Content Grabber menu, and then enter the Agent Name “cruisedirect”. Then click the Save button to commit your changes.
In the next section, Refine Your Data we use Content Grabber's Content Transformation method to change the extracted price data.