Content Grabber's editor layout includes a number of workspace windows which can be moved and re-sized to suit your development layout preferences. To help highlight this feature and demonstrate how you can configure the Editor Layout, we will reposition the Agent Explorer panel on the left of the Editor Layout screen.

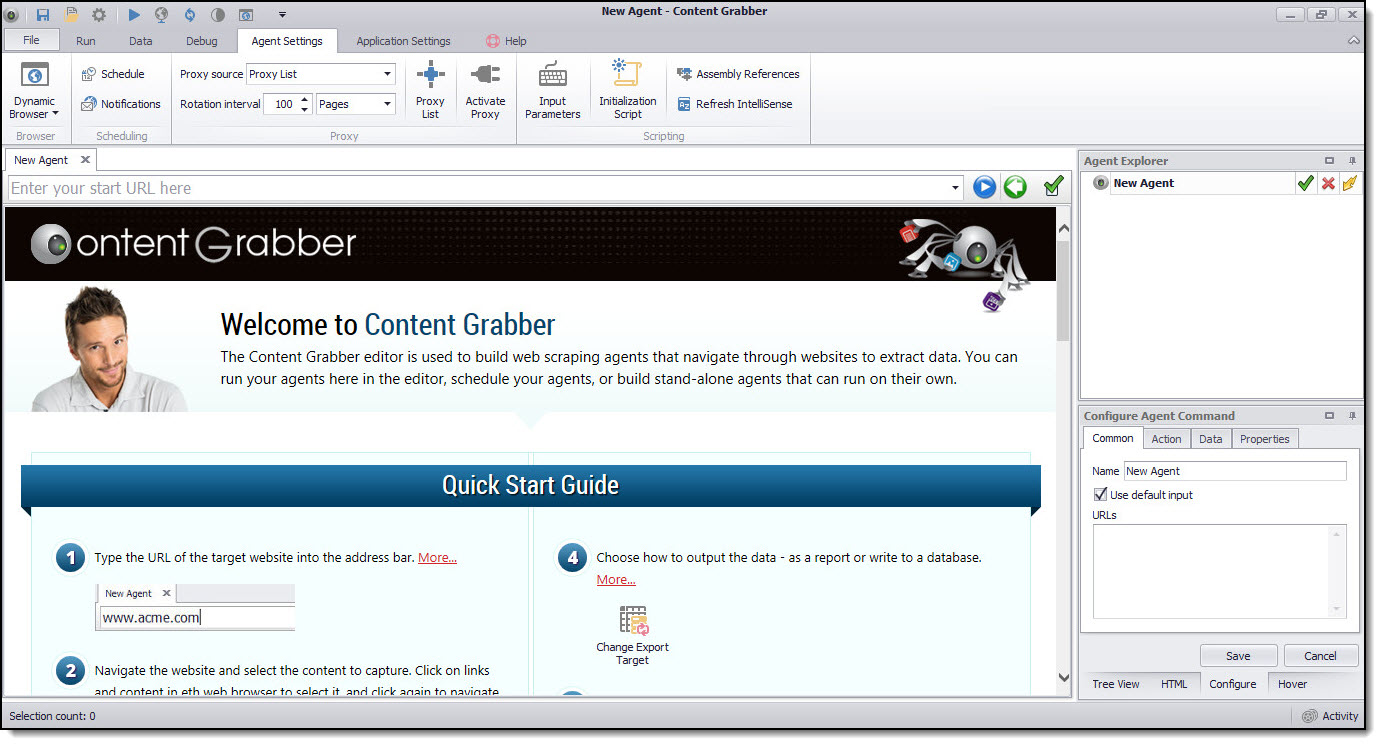
Content Grabber's default start screen with Agent Explorer on the upper right side of the screen
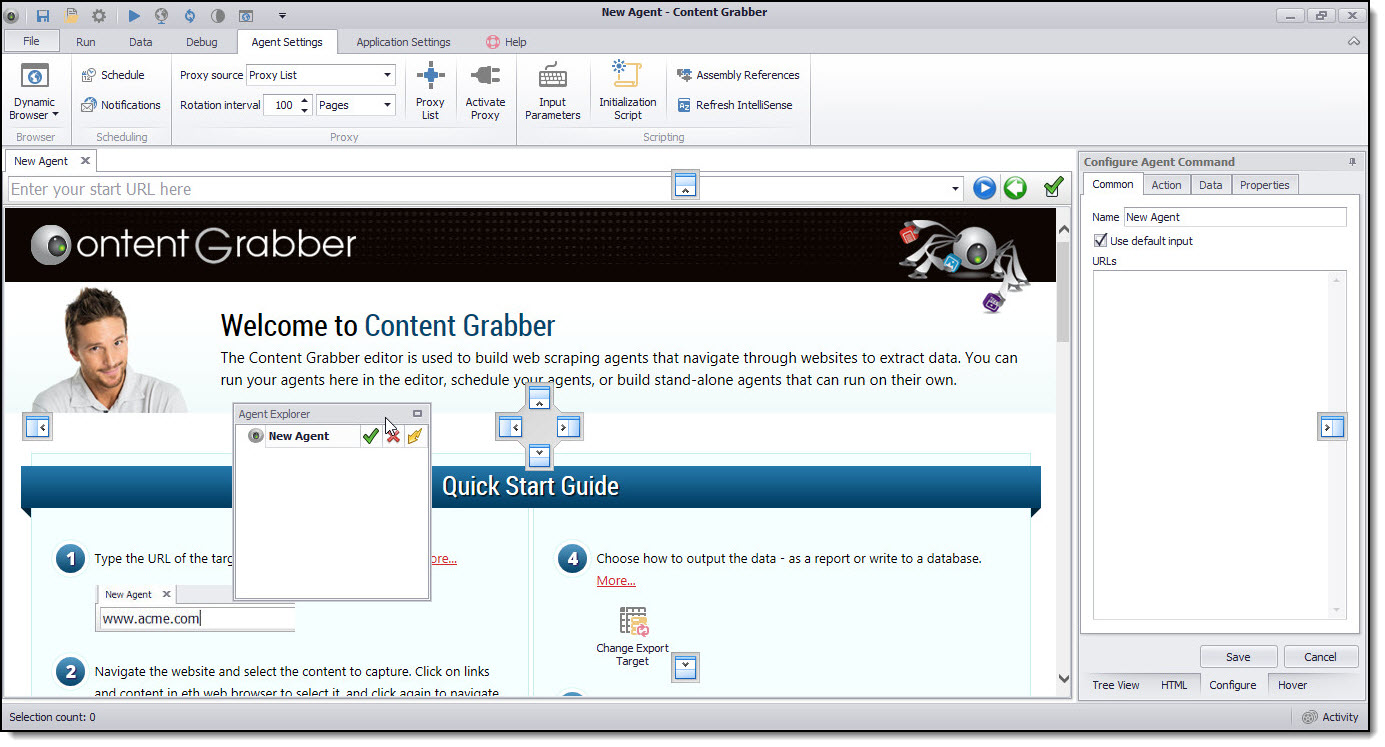
Now by simply positioning the cursor at the top label of the Agent Explorer panel and then clicking and holding the mouse button down, you can drag the panel to a new position on the screen. When you are dragging the Agent Explorer panel, you will notice a number of small docking objects appear with small arrows on them. These are the available docking areas to where you can drag and lock the panel into its new position.

Moving the Agent Explorer panel with the mouse - docking positions are displayed
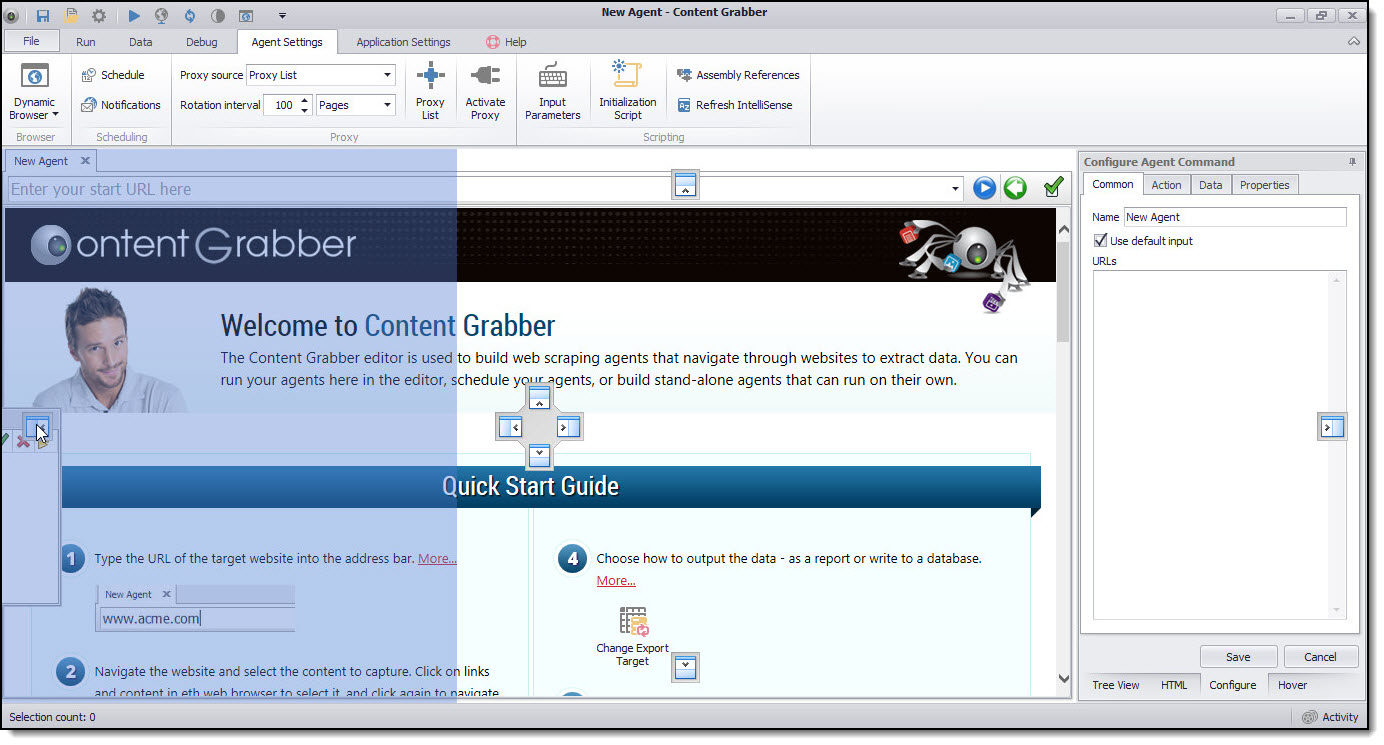
When you position the cursor over a docking position, you will notice the area changes color to blue. This means the panel is in position and you can let go of the mouse button to dock the Agent Explorer panel into this new position.

Docking position selected at the left of the screen - indicated by blue highlight
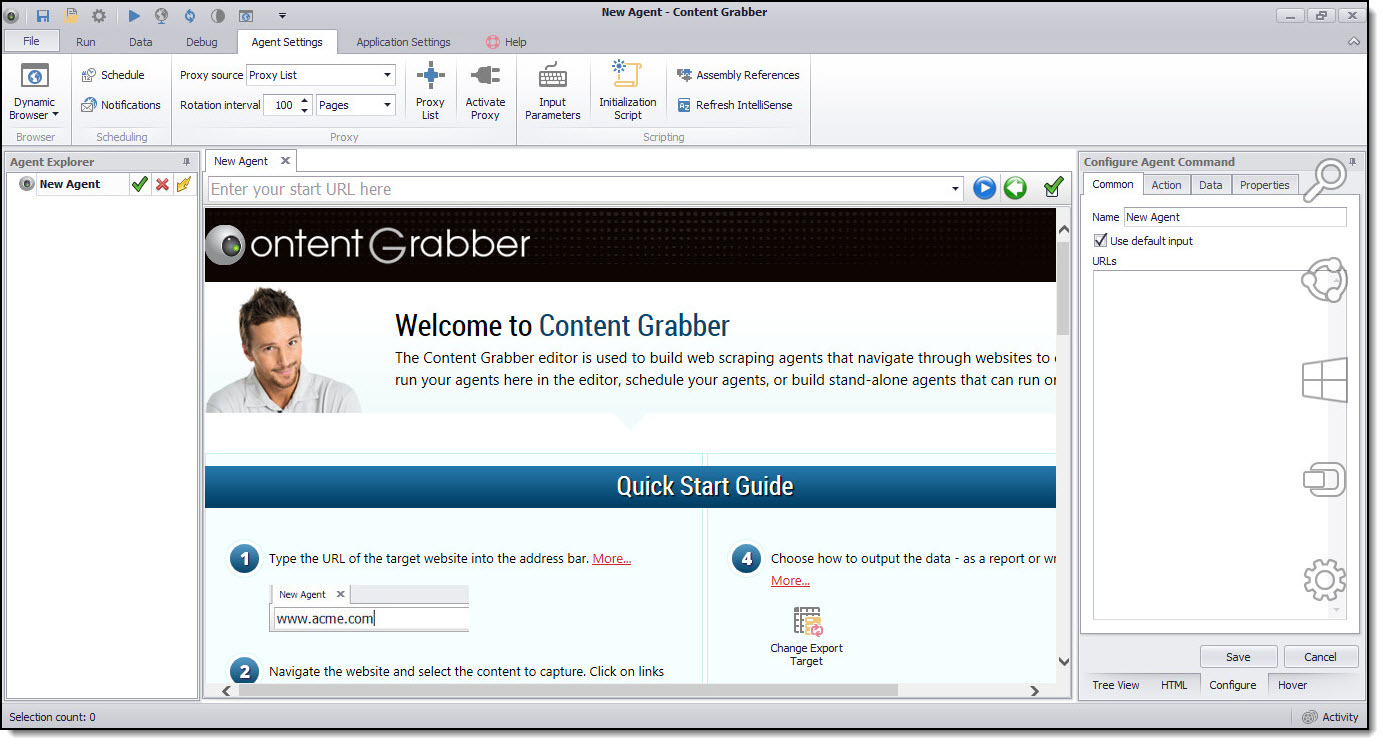
Once the mouse button is released, the Agent Explorer panel is relocated to the left of the Editor Layout screen.

Agent Explorer panel repositioned to the left of the Editor Layout screen