Content Grabber can be used for automated website testing and simple documentation. For example, an agent can be used to test and document a sequence of steps to perform on a website to complete a task, such as submitting a series of web forms. Every time the website is modified, the agent can then be run to ensure the steps are still working in accordance with the documentation. If the agent fails because the sequence of steps required to complete the task has changed, then an administrator can modify the agent to work with the modified procedure and automatically update the documentation for the procedure. If the agent fails because the website is broken, the developer team can be notified to correct the problem.
Configuring an Agent to Generate Documentation
An agent can be configured to generate documentation that consists of a number of steps to complete a procedure. Each step consists of a text description and an optional screenshot of a selected area or the full web page, and a selected web element can be marked with a red border on the screenshot.
Each step in the documentation must be configured individually using a Screenshot Log command.
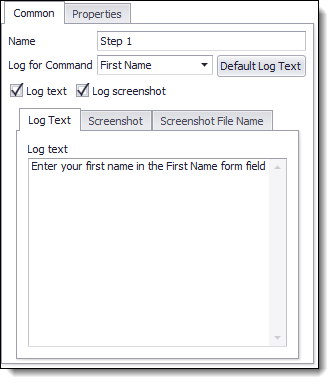
Log text configuration tab.
A Screenshot Log command can be associated with an action command to specify that the Screenshot Log command should provide documentation for that action command. By setting the associated action command, the Screenshot Log command can generate default log text, and mark the action command's web selection on the screenshot. Log text is the text that describes each step in the documentation.
The Log Text tab provides a single input field for log text. The Default Log Text button can be used to set default log text If an associated action command has been specified.
Log text can contain special templates to insert extracted data, input data, global data or input parameters.
Data |
Syntax |
Input data |
{$command_name|field_name}
Example:
Select {$Product 7|Default} from the Product 7 select box. |
Global data or input parameter |
{$field_name}
Example:
Click on the {$name} button. |
HTML attribute of web element selected by the associated action command. |
{$attribute_name}
Example:
Click on the {$value} button. |
The Screenshot tab specifies where to take a screenshot and what to mark on the screenshot.
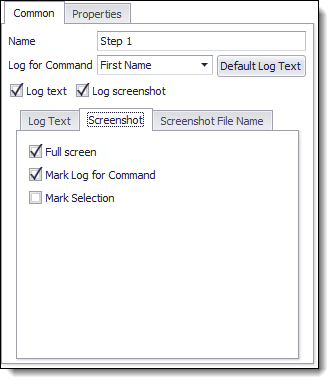
Screenshot configuration tab.
The Screenshot tab provides the following options.
Option |
Desscription |
Full screen |
Takes a screenshot of the entire web page. If this option is cleared, a screenshot is taken of the web element selected by the Screenshot Log command. |
Mark Log for Command |
Marks the web element, selected by the associated action command, on the screenshot with a red border. |
Mark selection |
Marks the web element selected by the Screenshot Log command with a red border. If the option Full screen is cleared, the Screenshot Log command must have two selections. The first selection will be used for the screenshot, and the second selection will be marked on the screenshot. |
The Screenshot File Name tab specifies how to name screenshot files on disk. By default the files are named using a unique identifier, but a data value can be used instead, and Content Transformation can be used to generate a file name.
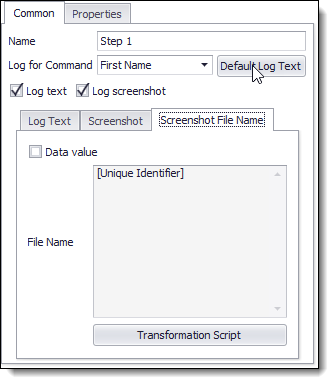
Screenshot file name configuration tab.
General Settings
General settings that apply to all Screenshot Log commands in an agent are available in the Screenshot Logging section of Agent properties.
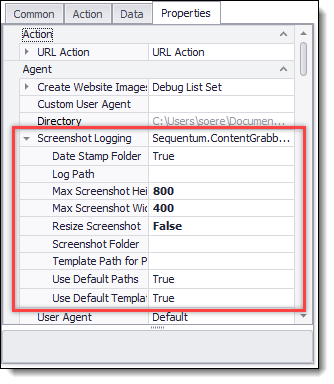
General Screenshot Log settings.
The following general options are available.
Data |
Syntax |
Date stamp folder |
Log file and screenshots will be placed in a sub-folder folder that is named with today's date. |
Use default paths |
Log file and screenshots will be placed in a sub-folder of the agent folder named ScreenshotLog . |
Log path |
Specifies the log path if Use default paths is set to false. |
Screenshot folder |
Specifies the directory where screenshots will be saved if Use default paths is set to false. |
Use default template |
The log template can be any text file that specifies the layout of the log file. A HTML log template is used by default and is located by default in C:\Program Files\Sequentum\Content Grabber 2\Resources\LogTemplates\ScreenshotLogPage.html. |
Template path |
Specifies the template path if Use default template is set to false. |
Resize screenshot |
Resizes the screenshot image files to the size specified by Max Screenshot Width and Max Screenshot Height. If this option is set to false, the default log template will display screenshots resized and provide links to the full sized image files, but will not resize the actual image files. |
Max screenshot width |
The maximum width of a screenshots. |
Max screenshot height |
The maximum height of screenshots. |
Generating Documentation
Screenshot Log commands are ignored during a normal agent run. To generate the documentation, the agent must be run using the button Create Screenshot Log from the Tools menu.
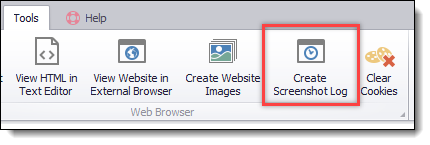
Press the Create Screenshot Log button to generate documentation.