The Download Image command extracts an image from a web page. The command will download an image, and then save it to the file system, send it to a database, or embed it into Excel - depending on your chosen export target. The web selection path for this command normally points to the image itself, but it could also point to a web element that contains a URL that links to the image.
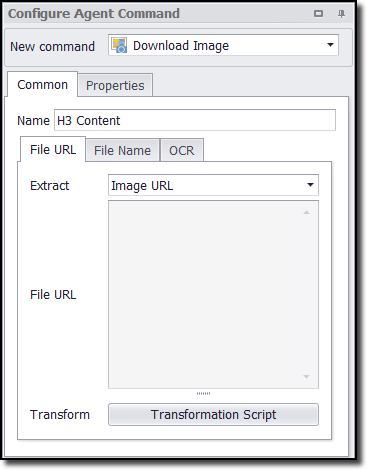
The figure below shows the Command Properties panel after choosing Download Image from the New Command drop-down:
Data Fields
If the agent is saving the image to a database, then by default this command will generate two data fields: one for the image data and another for the name of the image. If the agent is saving the image to the file system, the command will generate only one data field containing the full file path to the image. The command property Export URL can be used to also generate a data field that contains the image URL.
Command Configuration
The Common tab in the Configure Agent Command panel has three tabs:
•File URL - contains the URL for the image.
•File Name - contains the name of the downloaded image.
•OCR tab - check the box if you want to convert an image into text.
We explain the details of each below.
File URL
The entry in this tab determines the specific URL for the image, and the agent uses this URL to download the image at run time. You can choose the HTML attribute that the command should extract to get the image URL. The default value is Image URL, which extracts the src HTML attribute.
Click the Transformation Script button click to enter regular .NET expressions or write a .NET script that will transform the image URL to meet your requirements. This is often useful when you want to extract a large image, but it's easier to select a corresponding thumbnail image. You may then be able to transform the thumbnail image URL into the large image URL, and the agent will then use the transformed image URL to download the large image.
See the Content Transformation Script topic for more information about content transformation scripts.
You can choose the HTML attribute that the command should extract to get the image URL. The default value is Image URL, which extracts the src HTML attribute.
File Name
The entry in this tab contains the file name. From the drop-down menu you can choose the HTML attribute that you want to use as the name.
Click the Transformation Script button to enter regular .NET expressions or write a .NET script that will transform the image name to meet your requirements. See the Content Transformation Script topic for more information about content transformation scripts.
Use the Data Value option to specify that an agent data value will be used as file name. The agent data can come from a data provider, an input parameter or captured data.
Use the Detect File Extension option to specify if agent should try and detect the file type of the downloaded document, or if a transformation script or a data value will provide a file name that includes a file extension.
OCR
Using the OCR tab, you have the option to convert the image into text. For example, you might need to convert CAPTCHA images into text so that the agent can bypass CAPTCHA blocking websites. See the topic CAPTCHA Blocking for more information.
This tab gives you the option to export both the image file and the converted text, or just the converted text. To convert the image, you'll need to check the box and then enter a script to call an external OCR service. Content Grabber does not include an OCR feature, but allows you to integrate with 3rd party services by using this script feature. For more information, see the topic Image OCR Scripts.